

Internal oak doors are a great addition to any home because they add value while also providing a beautiful aesthetic, but installing them may seem like a daunting task. I love working with oak, and doors are no exception, but there are a few things worth knowing before you start.
With the right tips and tools, it can be a breeze! In this blog post, I will walk you through the steps for installing an internal oak door. We will also provide some helpful tips to make the installation process as smooth as possible.
So, if you are thinking about installing an internal oak door in your home, please read on!
Table of Contents
1. Let the Oak Doors Settle Before You Touch a Tool
One of the biggest mistakes I see people make is fitting oak doors straight out of the wrapper. I have seen firsthand how oak doors can cause problems later if they are fitted too quickly without time to acclimatise.
Oak is a natural material, and it needs time to adjust to the temperature and humidity of your home. Whenever I install oak doors, I always leave them in the room they are going into for a few days first, laid flat. It is a simple step, but it saves a lot of headaches later on.
2. Seal Every Edge Before Hanging
Oak doors are heavy and expensive, so it makes sense to protect them properly. A common DIY mistake is only finishing the front and back of the door and forgetting the top and bottom edges.
On several oak door installs I have done, especially in older houses, sealing all edges has made a huge difference in how stable the doors stay over time. Oak will absorb moisture from any exposed surface, so make sure your finish goes on every side before the door is hung.
3. Measure Twice and Be Careful How Much You Cut Off
Oak doors give you some room for adjustment, but not as much as people often think. I have been hired to install oak doors where previous doors had been trimmed too much, which is an expensive mistake to fix.
Because oak doors are heavier, they also need proper hinges and good fixings. I always use three strong hinges and take small amounts off at a time when trimming. It is much easier to remove a bit more later than try to fix a door that has been cut too short.
I hope this has helped you prepare for an oak door installation. Here are a few bonus tips to help along the way.
Choose Your Door Carefully
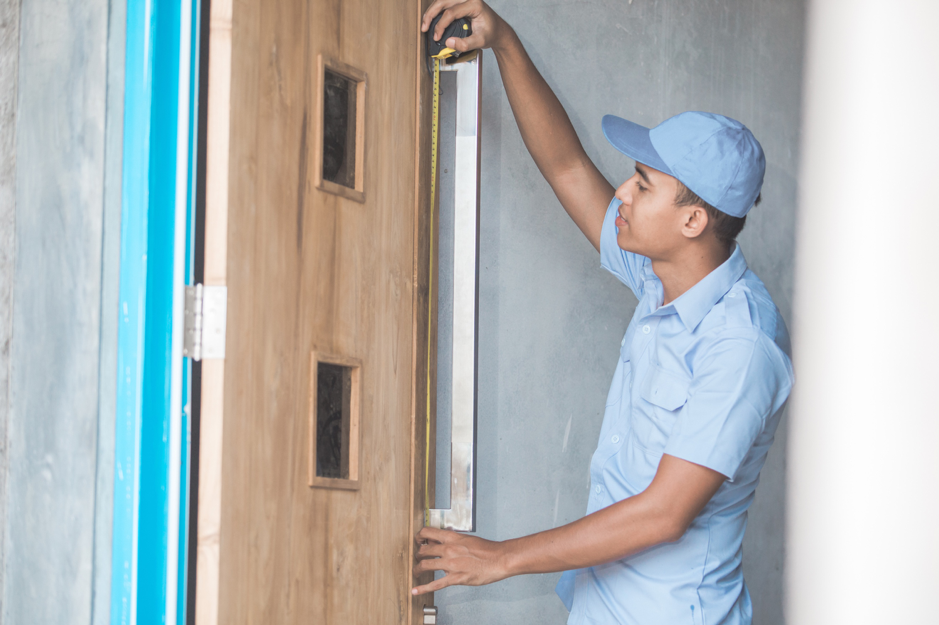
One of the most important things to consider when installing internal oak doors is the size of the door. Make sure that you measure the opening before purchasing your door. Internal doors come in a variety of sizes, so it is important to get the right size for your opening. Then you can choose and buy your internal oak door. It’s important to pick a high quality oak door that will look great and last for years.
Bonus Tip: There are a number of online retailers that have doors in their catalogue but we would recommend a specialist niche door retailer, for example, UK Oak Doors have a fantastic selection to suit any home and budget.
Remove the Old Door With the Correct Equipment

Before you install your new door, you’ll need to remove the old door. To do this, you will need a screwdriver and a hammer. First, use the screwdriver to remove the screws from the hinges of the old door.
Next, use the hammer to gently tap on the top of the door until it pops out of the frame. Once the old door is removed, you will be able to see the frame, ready for the new door. No matter if you choose interior french doors or single panel doors, the process is the same. Simply follow the same steps to remove your old door, and you will be ready to install your new internal oak door.
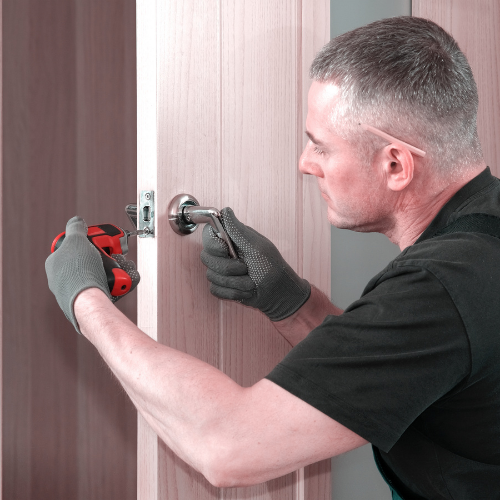
Measure & Install the Door Accurately
Now, it is time to install the new internal oak door! To do this, you will need a few tools, including a drill, screws, and hinges. When installing the door, be sure to start with the hinges. Attach the top hinge first and then work your way down. Once all of the hinges are in place, you can begin attaching the screws. Be sure to use a power drill for this step.
It is also important to pre-drill the holes for the screws to avoid splitting the wood. Finally, use a screwdriver or a drill bit to attach the knob or handle to the door.
Generally it’s recommended to hang your internal doors with at least 3 hinges to ensure stability and to sufficiently bear the weight of internal oak doors.
Frequently asked questions
Are internal oak doors easy to install?
Internal oak doors are not difficult to install if you have the right tools and instructions. It is important to take accurate measurements of the door opening before purchasing your internal oak door.
How do I measure for an internal oak door?
To measure for an internal oak door, you will need to measure the width, height, and thickness of the door opening.
What are the most common mistakes people make when installing internal oak doors?
One of the most common mistakes people make when installing internal oak doors is not taking accurate measurements. Another mistake is not levelling the door during installation, which can cause the door to bind.
Wrap Up & Final Thoughts
If you are unsure about anything during the installation process, it is always best to consult a professional, but with these tips in mind, internal oak doors can be easily installed.
If you want to enhance your learning and take things to the next level, here are Six Frequent Errors to Avoid When Installing Internal Doors. Thanks for reading and good luck!
I’ve also written a great post about replacing your architrave. It details the correct process for removing and adding new architrave to any internal door frame.
Thanks for reading, and all the best with your door installation.


